Cisco APIC: Lets talk about CIMC upgrade

Another interesting topic which I want to talk about - it's a CIMC (Cisco Integrated Management Controller) upgrade. This is a software on a APIC server which makes possible to manage server remotely (i.e. IPMI), including important remote console feature.
Each time when APIC software upgrade coming out it's possible that it will require a new version of CIMC software to be installed prior APIC upgrade. And this is what we will talk about in this article.
Preparations
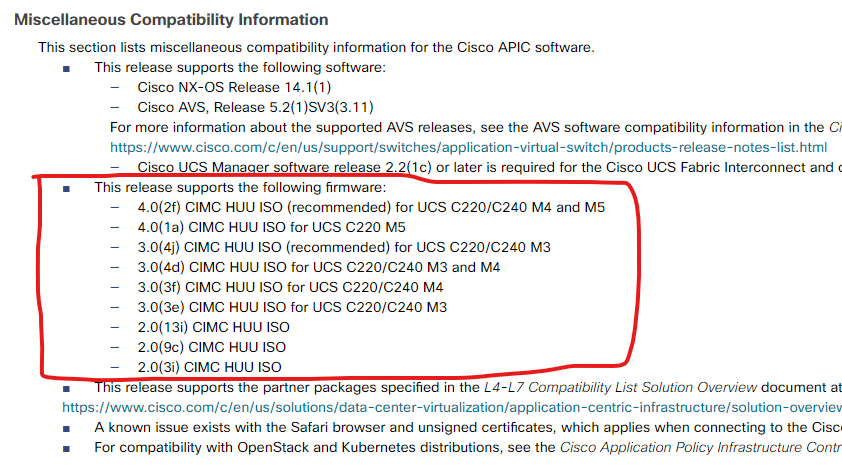
Visit page Recommended Cisco APIC and Cisco Nexus 9000 Series ACI-Mode Switches Releases and determine which CIMC version is recommended for your APIC release to what you want to upgrade. Also this information could be found in Cisco APIC release notes document.
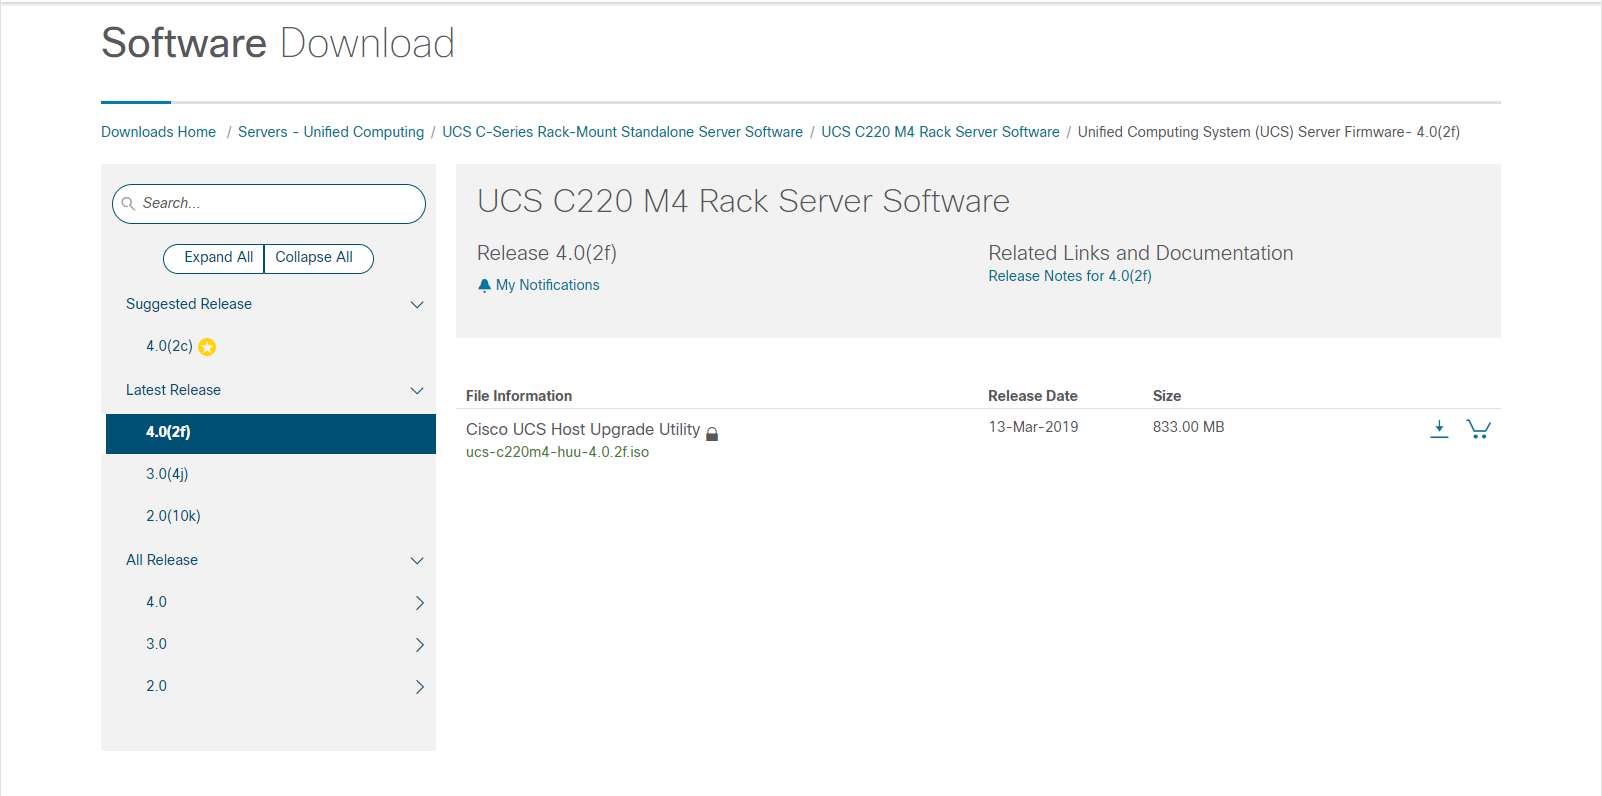
The next step is to download ISO image with an upgrade. Open software download page and search for Cisco UCS C-Series Rack-Mount Standalone Server Software, select your UCS server model and then Unified Computing System (UCS) Server Firmware. Select and download the new CIMC HUU ISO image.
Recommendations
- It's better to create a backup of your APIC configuration in case if something will go wrong.
- It's mandatory to upgrade only one APIC at the time. Proceed with the next controller after upgraded and restarted APIC will be commissioned back into the fabric and will be in the "Fully fit" state for at least 5 minutes.
- It's recommended (but not required) to decommission APIC prior to CIMC upgrade to make sure that all processes on APIC are terminated successfully and the rest of a cluster is synchronized.
Let's go!
1. Decommission controller
This step is not required but recommended.
Login to APIC GUI, but that should be not the controller, that you will decommission. In other words, the software will not allow you to decommission the controller from itself. So if you have for example three controllers and want to upgrade controller #1, log in to #2 or #3.
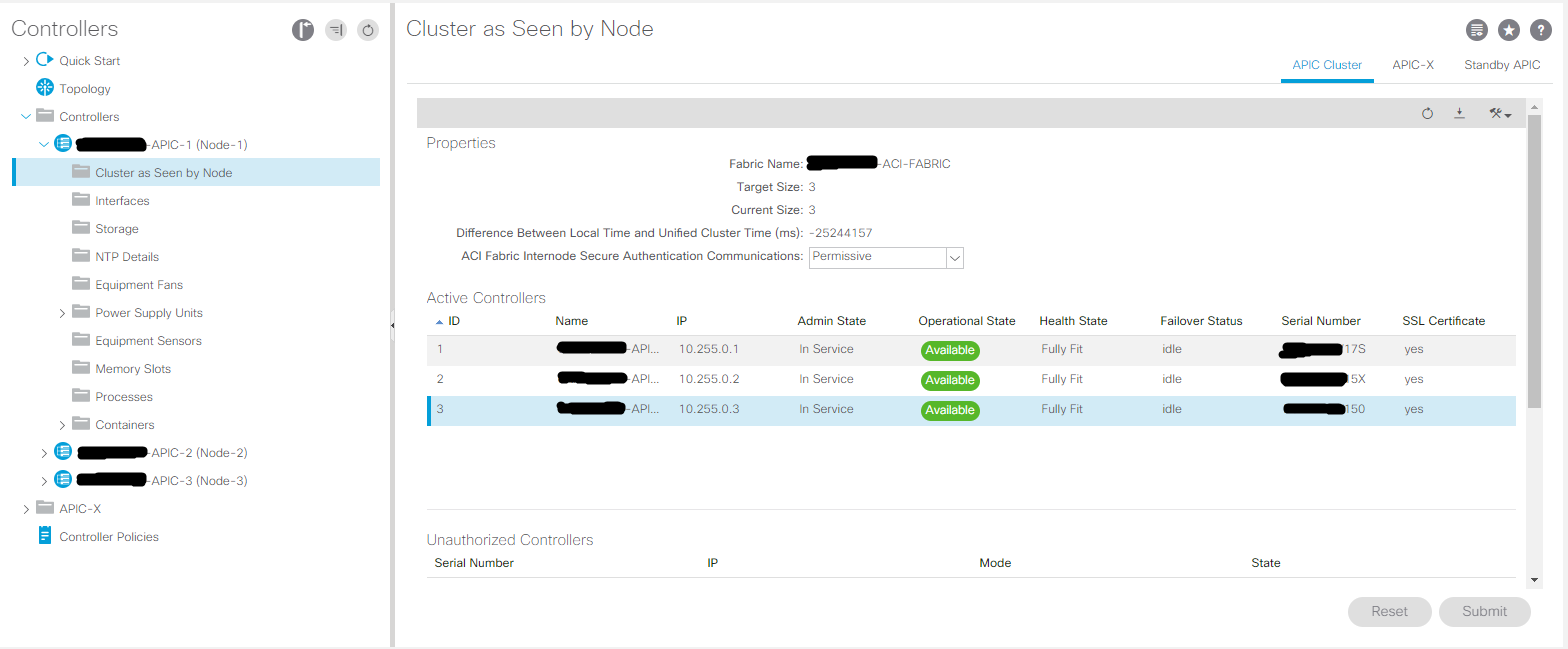
Proceed to System -> Controllers and expand Controllers folder in the left pane, expand Controller #1 and select Cluster as Seen by Node item.
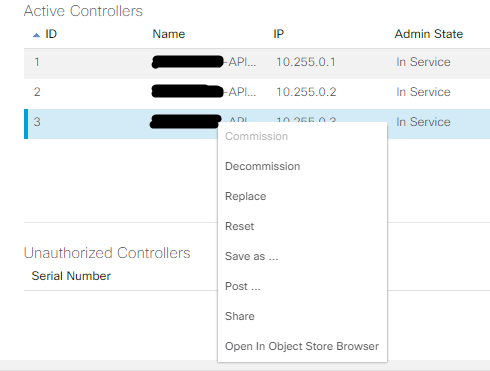
Select the controller that you want to decommission and click on it with the right mouse button. Then in the context menu select Decommission.
You will see the confirmation dialog, accept decommission pressing on Yes button.
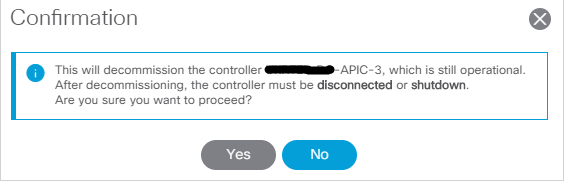
Verify that controller is decommissioned. You should see that controller is in Out of service state and Operational state is Unregistered.

2. Create key macros and map upgrade image
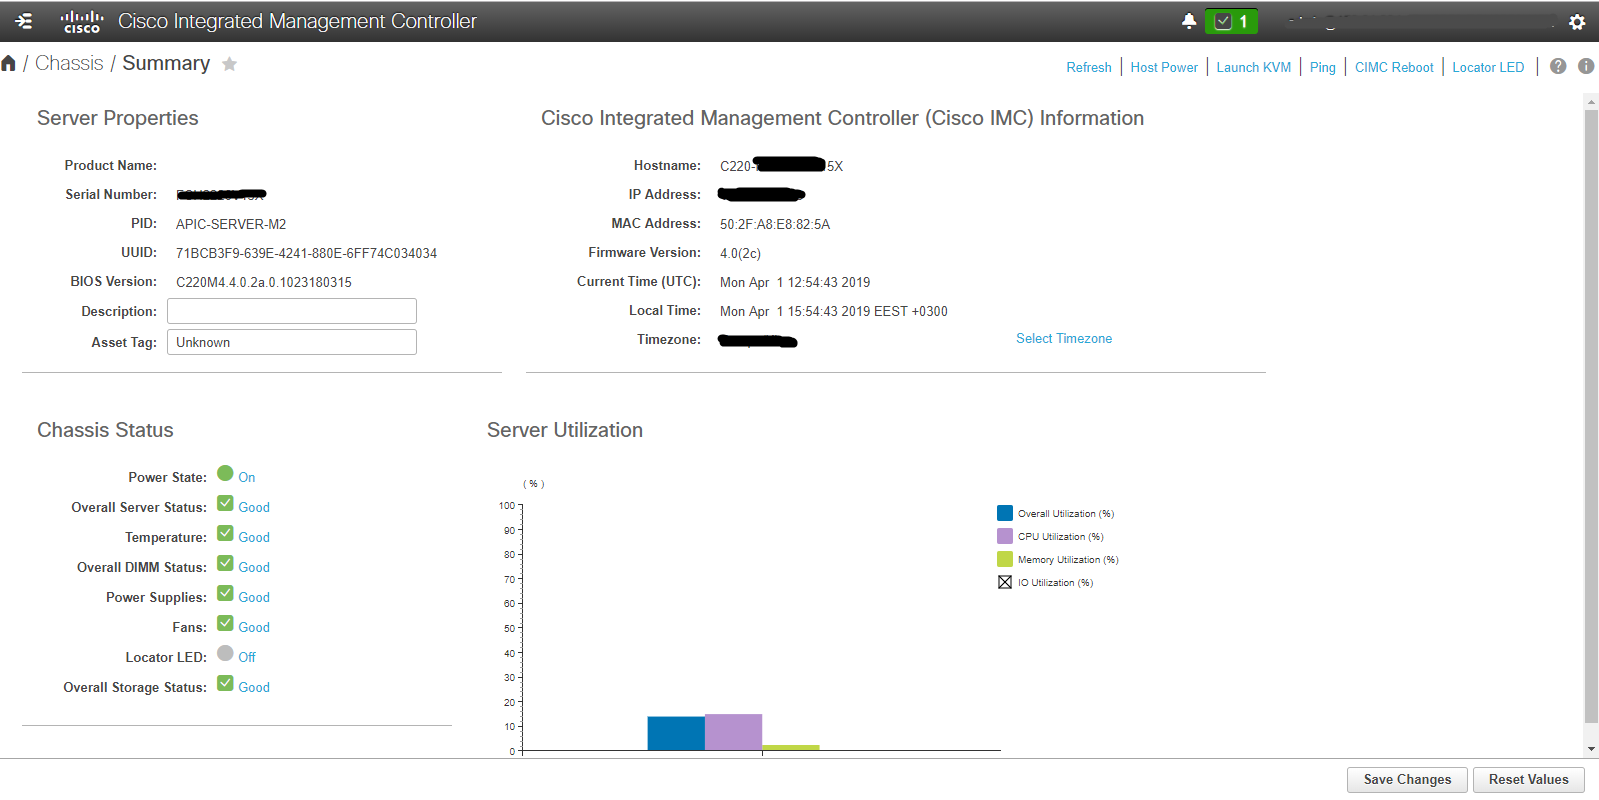
Open CIMC web-page of the server that you just decommissioned and log in to it.
Click on Launch KVM link in the top right corner and select a desirable version of KVM. There are two options: Java KVM and HTML KVM. In this article I'm displaying screenshots from Java KVM.
Note: I've recently done an upgrade of CIMC again to version 4.1.1 and after upgrade noticed that Java KVM was removed. So only HTML KVM is available now. HTML version has the same controls as a Java version.
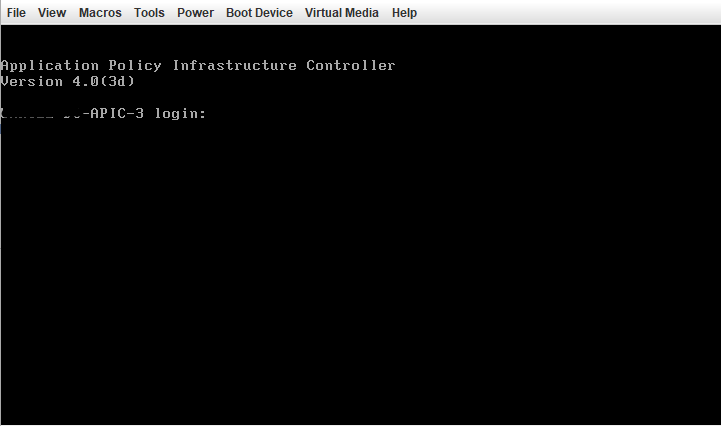
Verify that you seeing correct server KVM by checking the login prompt. In my case it's the APIC-3 controller and it's the same controller as I decommissioned earlier.
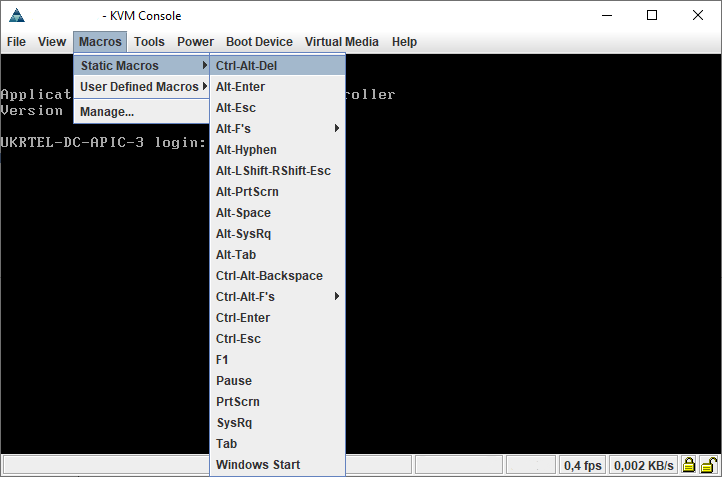
To make sure that you will be able to get into the server boot menu after reboot, you need to create key macros. Open Macros from the top menu and select Manage... item.
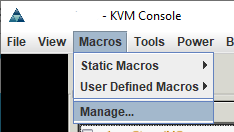
You will see the list of existing key macros. View the list, maybe you're already have macros for F6 key. If not, click on the New button.
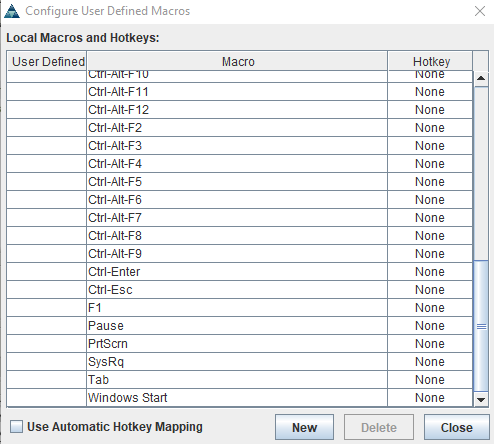
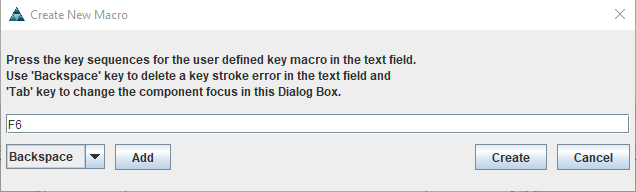
In a Create New Macro dialog click on a drop-down list and select F6 item then click on Create button.
You should see now the F6 key macros on the list. Close Macros list dialog.
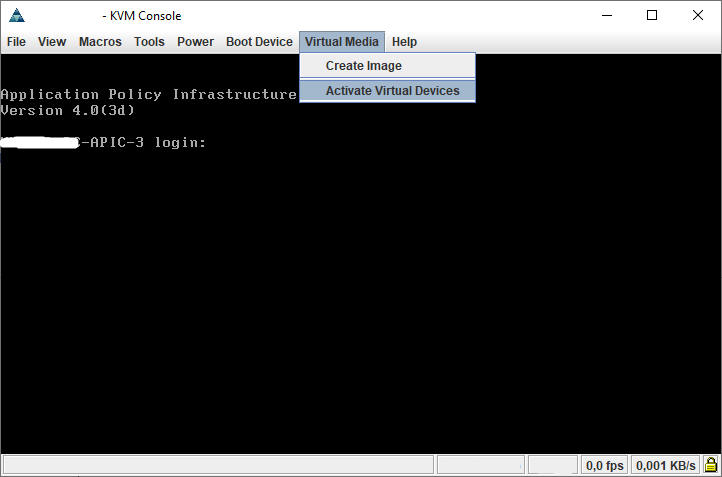
As was said earlier, you need to have an Upgrade ISO image. To connect it to the KVM open Virtual Media menu and then click on Activate Virtual Devices item.
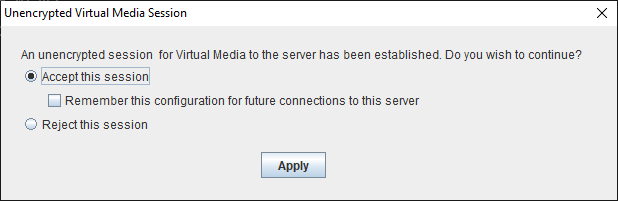
After that accept the session in the next dialog and click on Apply.
Now you need to select ISO image. Open Virtual Media menu. You can see that it now has additional items. Click on Map CD/DVD... item.
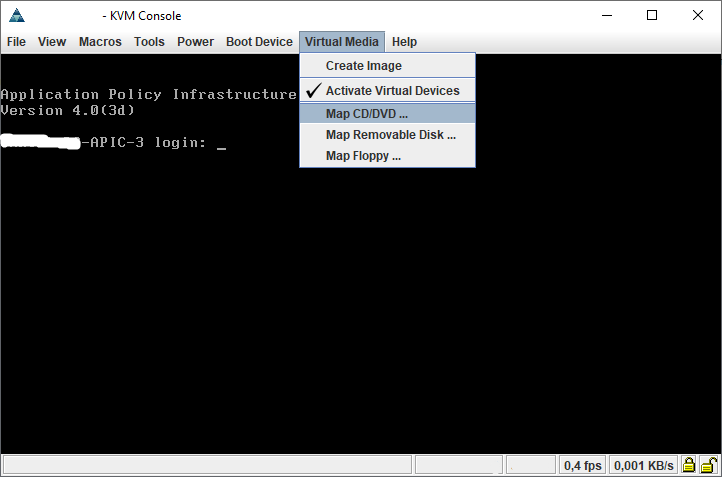
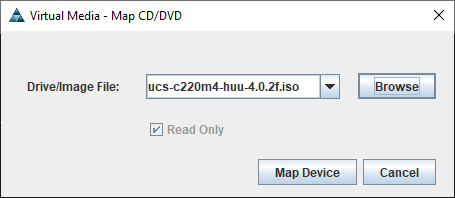
Select the upgrade ISO image by clicking on Browse button and then click Map Device button.
3. Upgrading firmware
The next step is to reboot the server and boot from the upgrade image. A reboot can be done in two ways: a) you can select Macros menu and in Static Macros click on Ctrl-Alt-Del item, or b) select Power menu and click on Power cycle system (Cold boot) item.
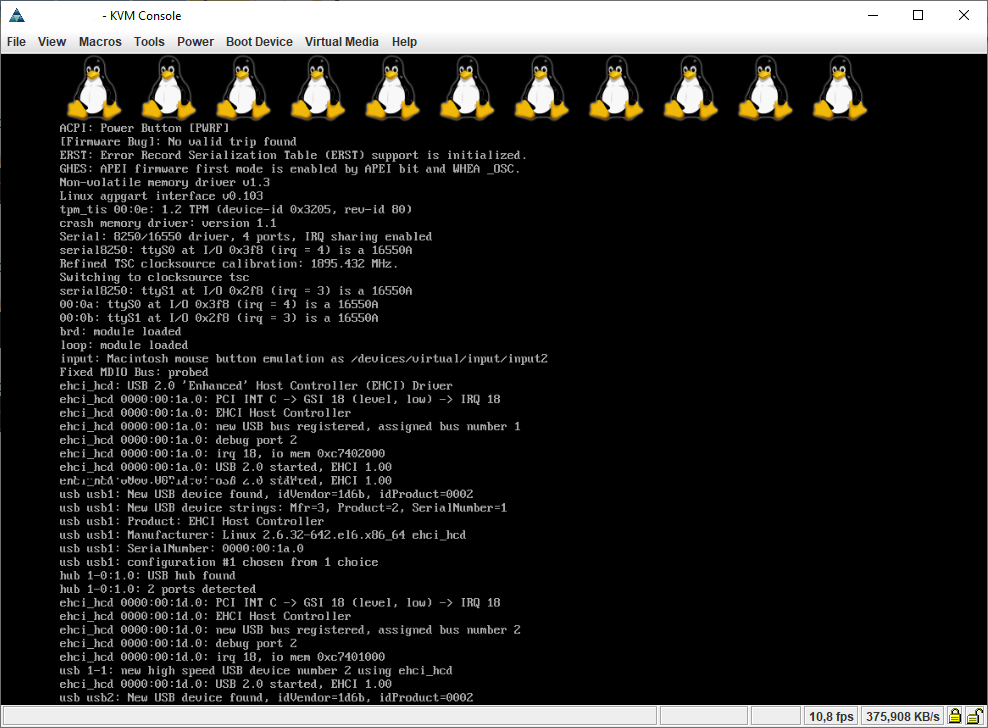
The server will be rebooted. Now wait until the Cisco logo with another service data will appear on a KVM screen.
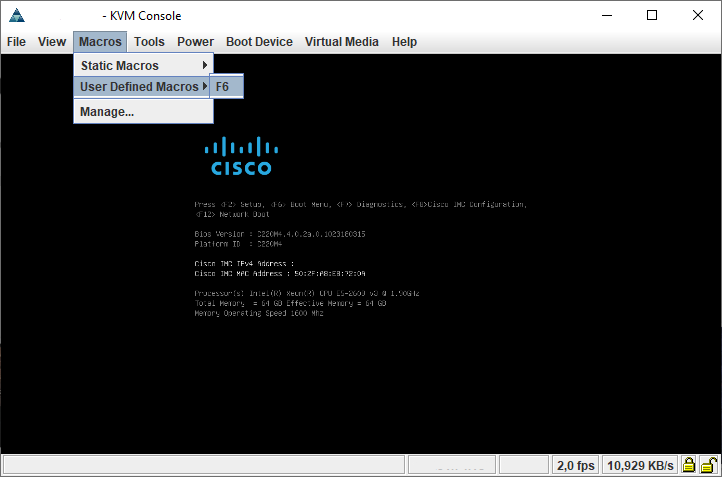
Once you will see the same as above, open Macros menu and under User Defined Macros click on F6 to transfer keypress to the KVM and enter the boot menu.
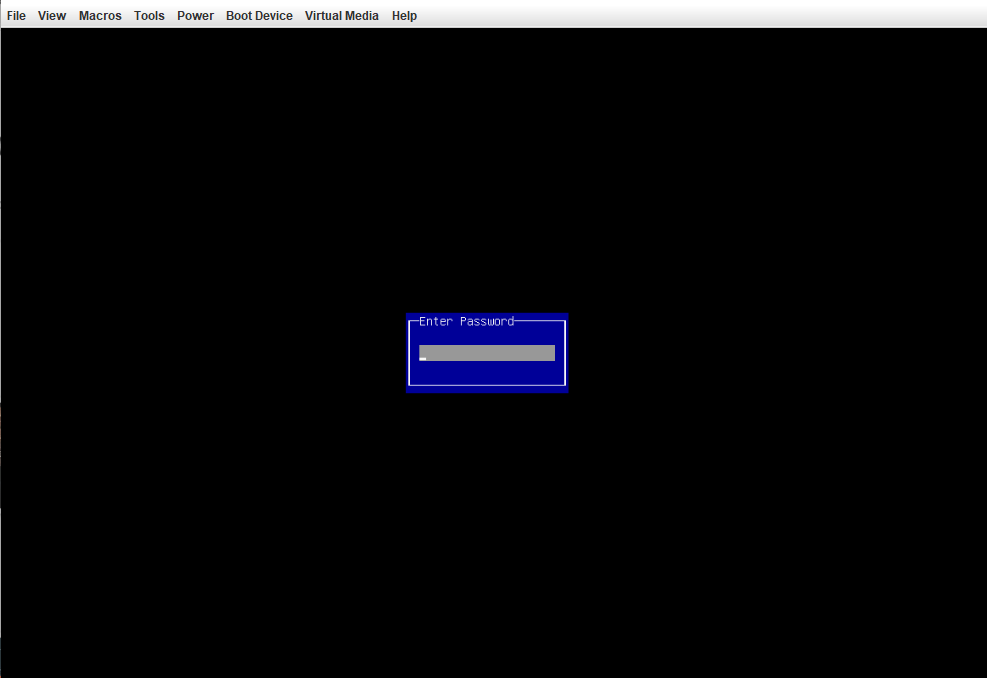
If you have a boot menu password set, it will be prompted on the next step.
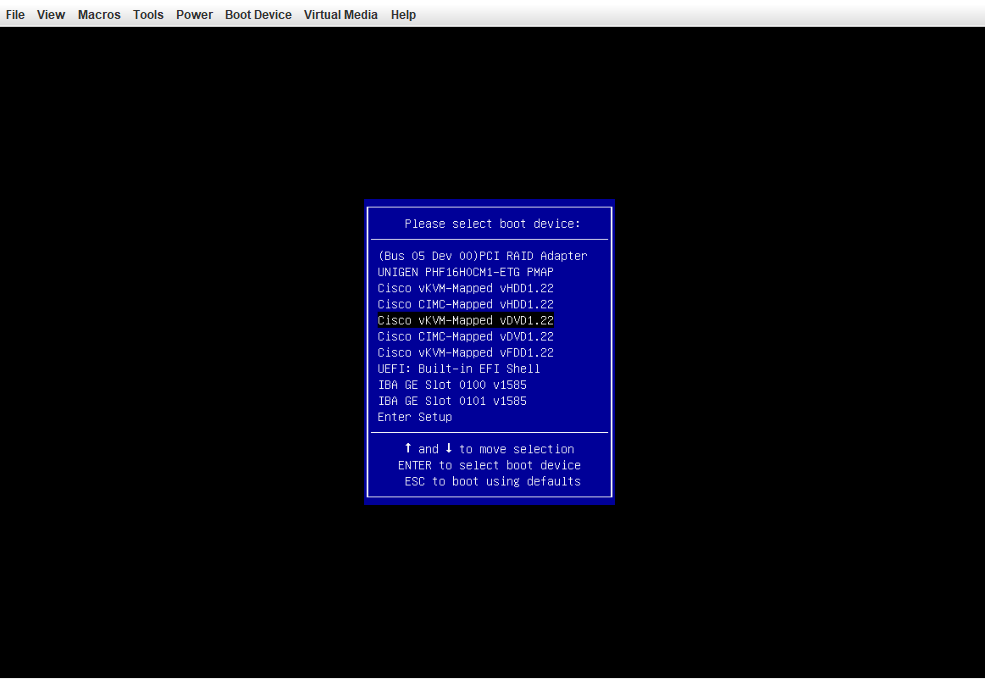
Once the password provided after some time the boot menu will appear. Select Cisco vKVM-Mapped vDVD1.22 item with your keyboard and press Enter.
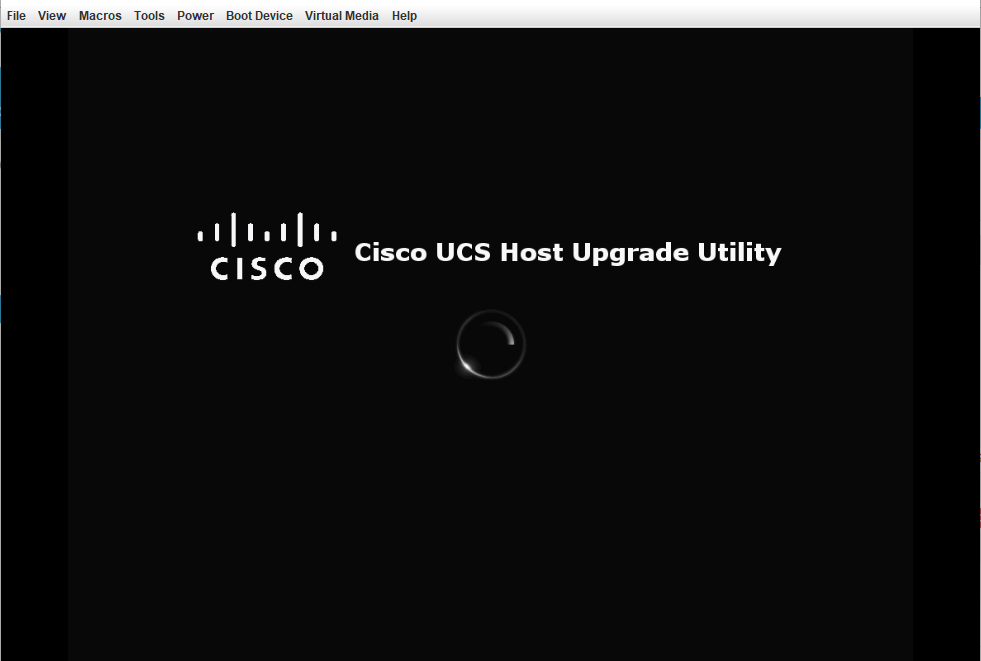
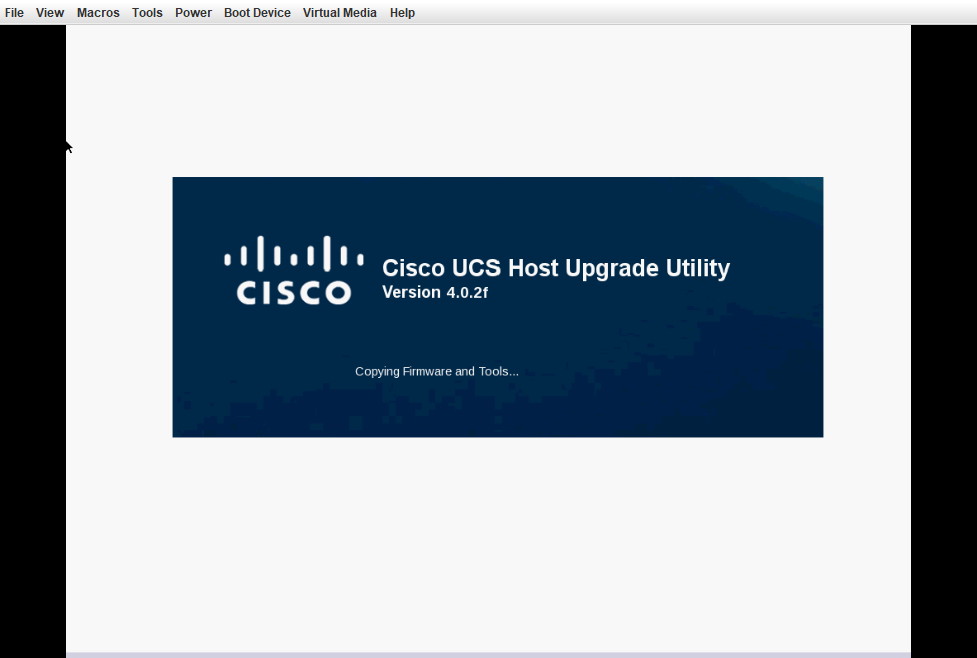
The server will now boot from image.
You will need to wait some time while installation data will be copied on the server.
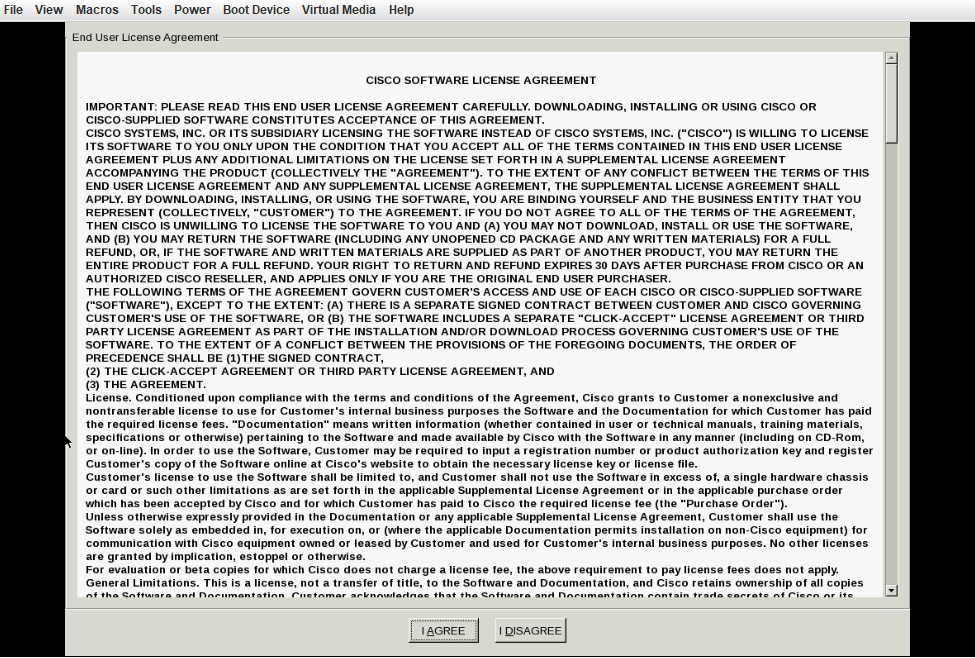
When all required procedures completed you will see license agreement dialog. Read it and click on I AGREE button.
In the next window you will see server components, their current firmware versions and versions that these components can be upgraded to with the current image.
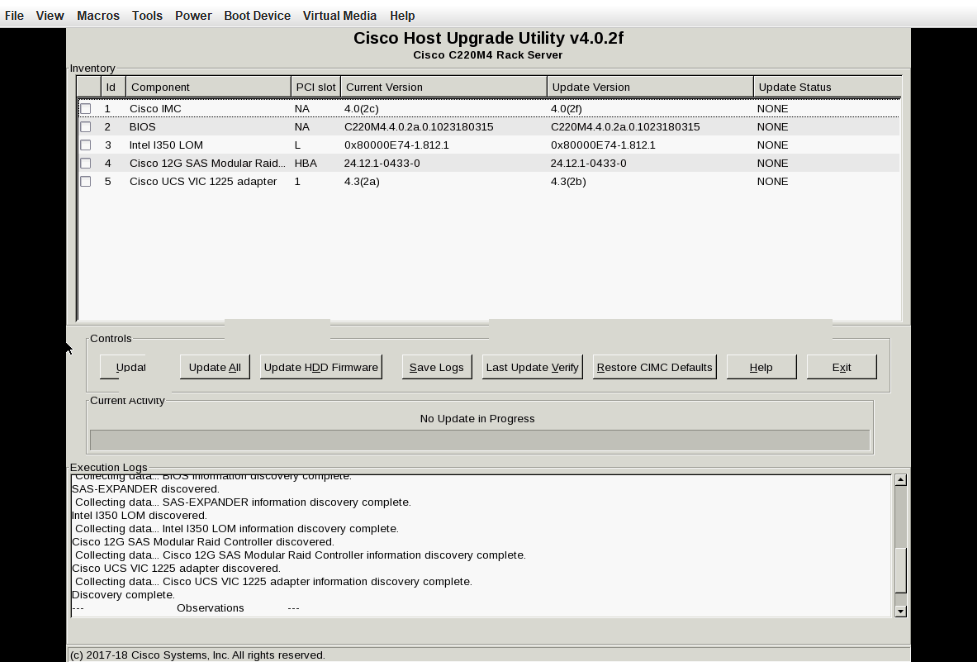
As you can see, only Cisco IMC and Cisco UCS VIC adapter can be upgraded with this image. You can select only the components you wish to upgrade and then click on Update button. Or you can simply click on Update All (which is recommended) and the upgrade software will determine automatically which component can be updated.
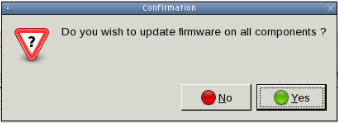
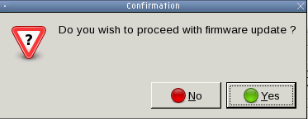
Now you need to click on Yes in two dialogs.
After that utility will start the upgrade process. This process can take up to 60 minutes depending on what number of components need to be updated.

When the update process completed, buttons will become active again and each component will have update status in the table.
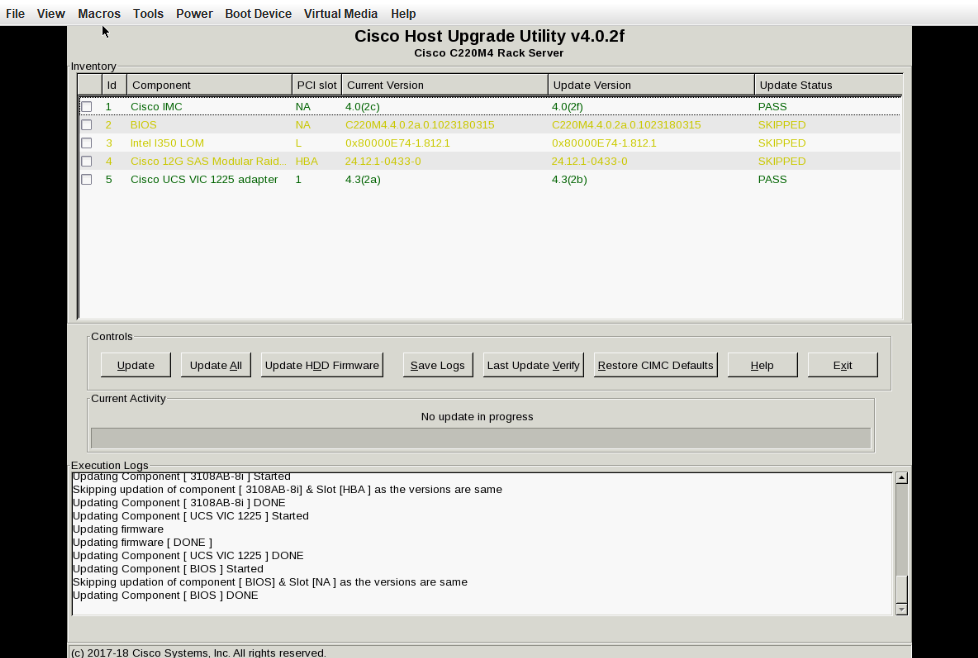
As seen from the table, Cisco IMC and Cisco UCS VIC have been updated, when the other three components are skipped as their version is the same as in this upgrade image.
To complete the process, click on Exit button and confirm this operation in the next dialog with click on Yes button.
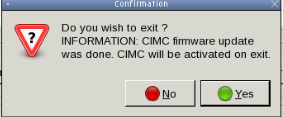
Note: Dialog will not react to the click (graphically), so there is no need to click it more than once. You can start pinging CIMC address to verify that it went to reboot. After some time you will see NO SIGNAL message in the KVM window.
4. Success
At this point the upgrade process can be considered complete. You may verify the current version of CIMC by logging into web-interface and checking Firmware version field on a welcome page right after CIMC will become available after reboot. Also launch KVM to make sure that APIC is booting.
Note: During the last upgrade process, BIOS was also updated in addition to IMC and other components. And after CIMC reboot I found that the server power state was Off. This is because the server was completing BIOS update process. So there is no need to manually turn the power on. If you have ping running to CIMC address, you could see that after the first reboot it will go into reboot one more time. And after CIMC will boot again, the server will be started automatically.
5. Commission controller
If you decommissioned the controller before CIMC upgrade, you need to commission it back to the fabric. To do so, open APIC GUI and proceed to System -> Controllers and expand Controllers folder in the left pane. Expand one of the controllers and select Cluster as Seen by Node item. Click on the decommissioned controller then open context menu and select Commission. In displayed confirmation dialog confirm commission of the controller.
Now fabric will start synchronization of configuration across controllers. You may see that the controllers health state will change multiple times during this operation. Make sure you'll wait at least 5 minutes before starting the upgrade of the next APIC CIMC.
Repeat operation for the rest of the controllers in fabric.
Afterword
I hope this article will help you to understand and prepare for CIMC upgrade process. If you will have any questions, you're welcome to leave a comment below.


Member discussion