Configure L3Out SPAN in Cisco ACI
Today I want to show you how to configure SPAN of L3Out in Cisco ACI. Screenshots demonstrated here are from Cisco APIC 4.0.3d.
Test stand
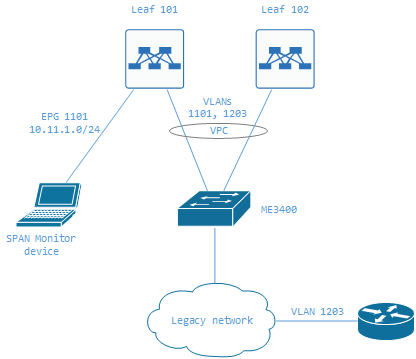
Little explanation of what we have: ACI fabric with two leaves - 101 & 102, switch ME3400, router and monitor device that will receive SPAN data for further analysis. ME3400 connected to leaves via VPC and providing a connection to the legacy environment. Over this connection a legacy router establishes EIGRP session with SVI in fabric L3Out. Our goal is to send copy of that SVI traffic to the monitor device. Monitor device connected directly to the leaf 101 and resides in EPG ME3400_VL1101_EPG and has IP address 10.11.1.1/24 configured.
L3Out SVI configuration for example:

Please read whole article before starting to make any changes in your fabric!
Configuration
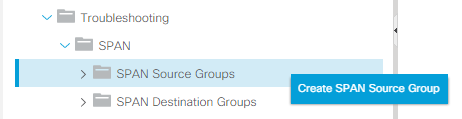
Open APIC GUI and head over to Fabric -> Access Policies -> Policies -> Troubleshooting -> SPAN.
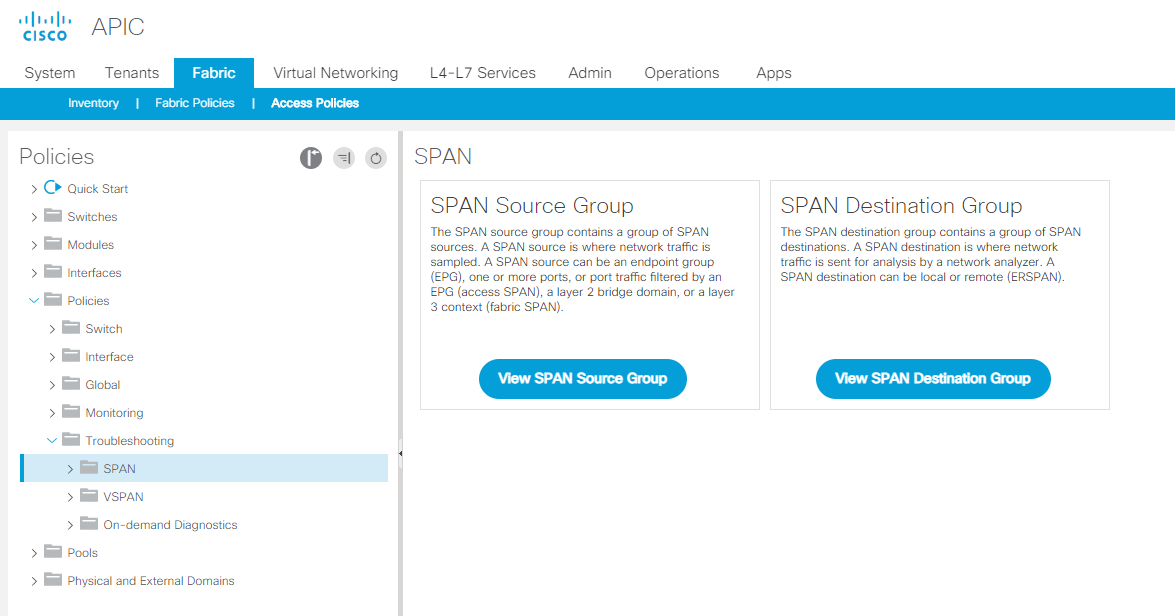
If you expand SPAN item you will see additional items - SPAN Source Groups and SPAN Destination Groups. We will do all configuration changes here.
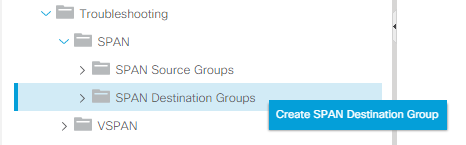
Right-click on SPAN Destination Groups item and select Create SPAN Destination Group.
You will see the following dialog:
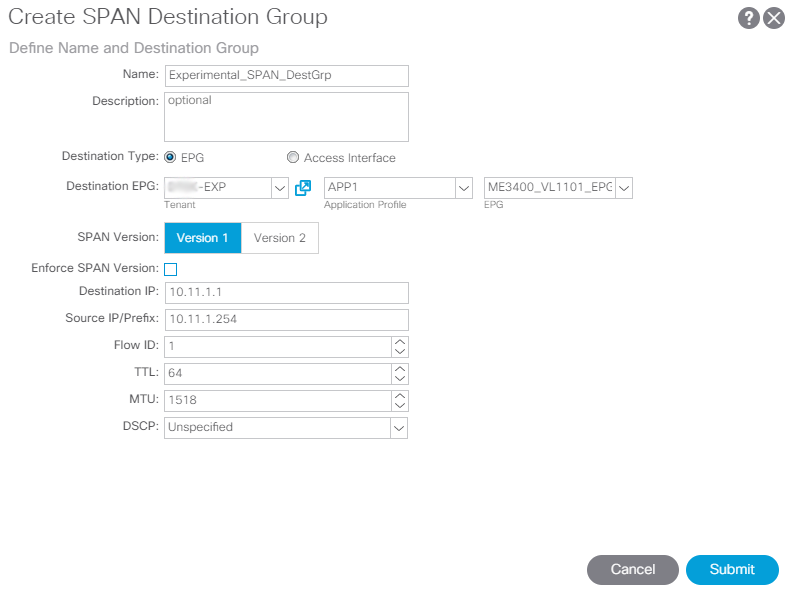
- Name - SPAN destination group name.
- Destination type - Select EPG as we're going to configure ERSPAN session.
If destination type Access Interface is selected, then monitor destination should be on the same leaf as source interface! ERSPAN (EPG) here gives more opportunities, as it allows to place monitor device on any leaf. - Destination EPG - select here tenant, application and EPG where monitor device located. In my case it's EXP tenant, APP1 application and ME3400_VL1101_EPG.
Tenant should match the tenant of L3Out which we will configure as the source for SPAN traffic. - SPAN Version - Select Version 1.
Version 2 is only available for fabric port SPAN. - Destination IP - IP address of your monitor. In my case - 10.11.1.1.
- Source IP/Prefix - Source IP of ERSPAN packets. Could be set to any value. In my case it's bridge-domain (gateway) IP address - 10.11.1.254.
- Flow ID - Identification number of ERSPAN flow. Your monitor can receive multiple ERSPAN sessions and to distinct them between each other you can use different Flow ID values. Available values from 1 to 1023.
- TTL - ERSPAN packets time-to-live. Available values from 1 to 255.
- MTU - maximum size of ERSPAN packets. The range is from 64 to 9216 bytes.
- DSCP - Differentiated service code point of the packets in ERSPAN traffic. Values from 0 to 64.
Click Submit to create destination group. You can verify that group created in left menu.
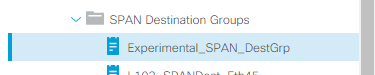
Next step is to create SPAN source group. Right-click on SPAN Source Groups and select Create SPAN Source Group.
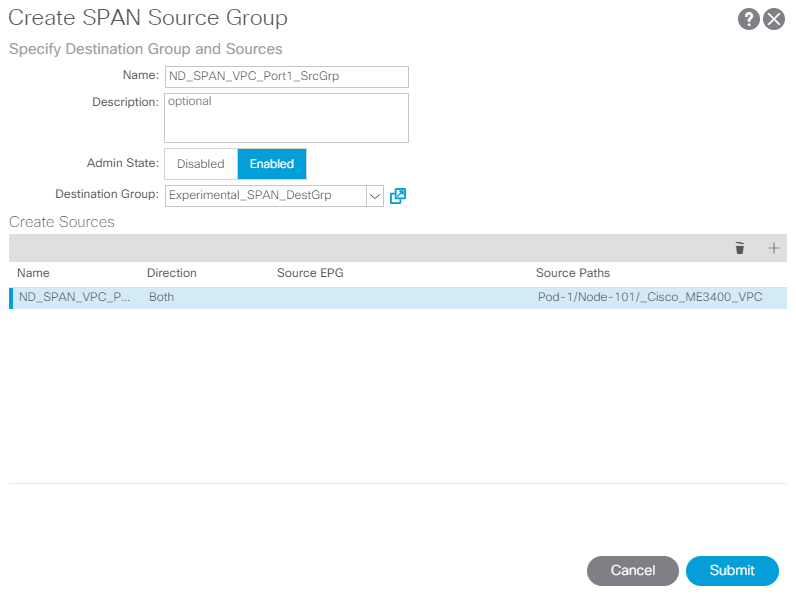
This will open dialog:
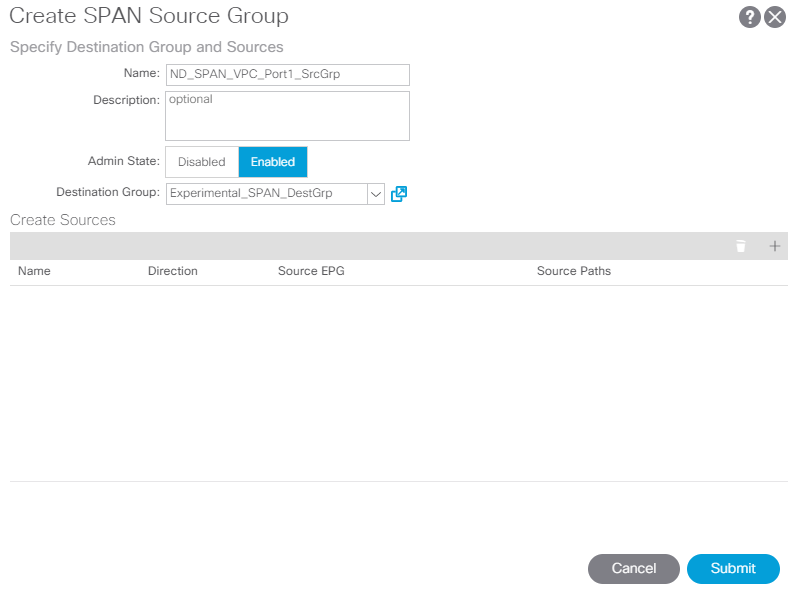
- Name - SPAN source group name.
- Admin State - SPAN source state. If set to Disabled then no data is send to configured monitor.
- Destination Group - SPAN destination group. Select destination group that we created on previous step.
SPAN destination groups can be reused by multiple sources.
Click on + sign in Create Sources section.
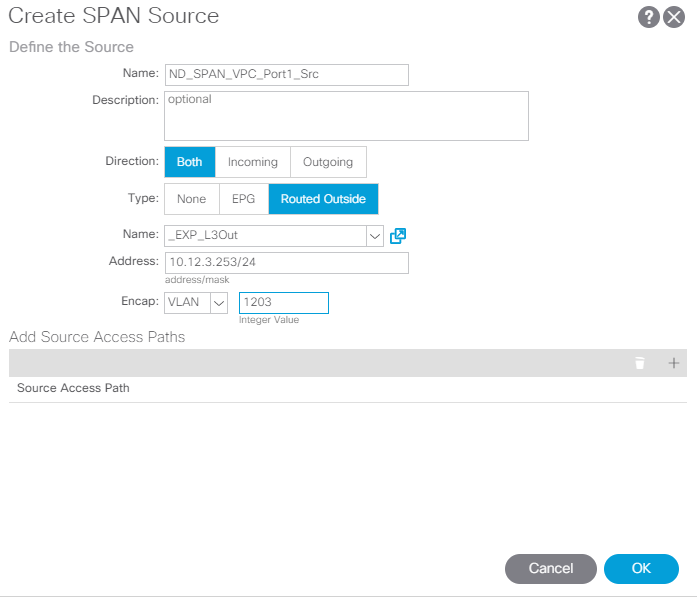
You will see the dialog placed above. Fill fields:
- Name - SPAN source name.
- Direction - direction of source port traffic that will be sent to destination (inbound, outbound or both).
- Type - type of the traffic source. Could be None (in this case you can select physical leaf interfaces), EPG or Routed Outside. In our case we need Routed Outside.
After Routed Outside selected next fields will appear in dialog: - Name - L3Out name. In my case its _EXP_L3Out.
- Address - IP address that configured from L3Out connection side. In my case its 10.12.3.253/24 - IP address of SVI Side A.
Due to limitations, you're cannot select a whole VPC as a source access path in SPAN source. Instead you will need to create a multiple SPAN source groups and sources and select VPC Components as a source access paths (will be displayed further). - Encap - encapsulation type and ID. In this case only VLAN is allowed as encapsulation type and VLAN ID in my case is 1203.
Click on + sign in Add Source Access Path section. In opened dialog select:
- Path Type - type of source interface. In our case we need VPC Component PC.
- Path - actual interface/VPC/VPC component. Depending on selected Path Type choices will differ. As we selected VPC Component PC before, select VPC component of our VPC interface on leaf 101.
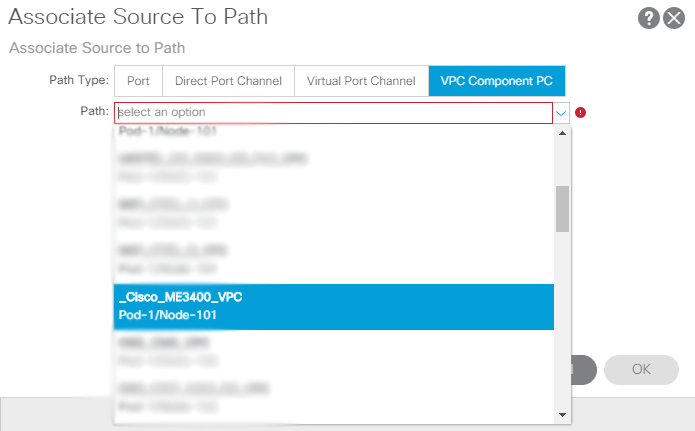
After path have been selected press on OK button to return to previous dialog.
Now you can confirm that we have all set for SPAN source:
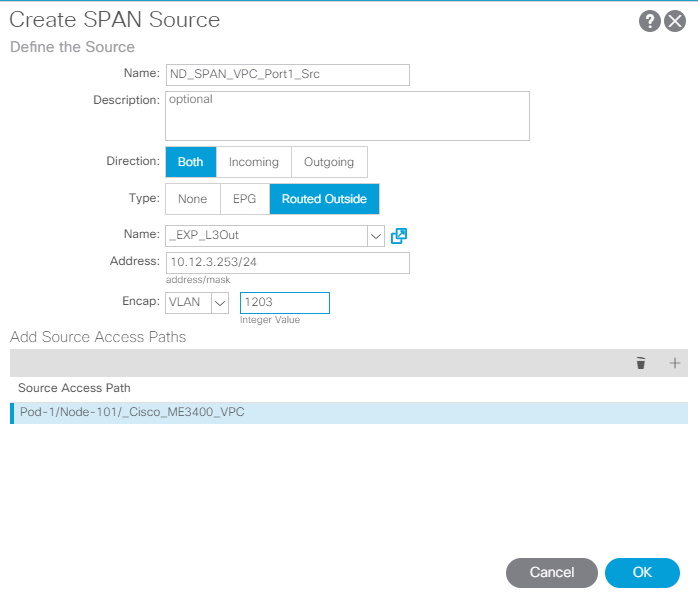
Click OK button to confirm changes for SPAN source and return to previous dialog.
You will see now previously created source in SPAN Source Group dialog and that means that we can click on Submit here to complete SPAN source group creation.
You can confirm that source group created by looking in the left menu:

Now you need to repeat steps and create one more SPAN Source Group with its SPAN source and access path for VPC component from leaf 102. As was mentioned before ACI have limitations and adding multiple VPC components to single SPAN source or mixing multiple SPAN sources in single SPAN source groups is not allowed. That's why you need another one.
At this point configuration of SPAN is completed and you should be able to see packets in your monitoring software (ex. Wireshark).
P.S.
If using Wireshark, enable "Enforce to decode fake ERSPAN frame" under Edit -> Preference -> Protocols -> ERSPAN.
P.P.S.
Some monitor devices that are set for "listening" traffic could act as "silent hosts". Fabric require that monitor host be learned before sending SPAN data to it. So make sure to check EPG operations tab and verify that monitor host learned. If it's not, then turn on L2 Unknown Unicast Flood and ARP Flood under bridge-domain configuration.
More to read about SPAN in ACI:


Member discussion