Configure CallHome feature in Cisco ACI

At least for me it was little tricky to get all together to finally configure this feature. Due to lack of documentation (yes, never thought I would say that) few moments was totally unclear. Here I will try to create a brief summary of what should be done to CallHome function correctly.
Preface
- What we got: initialized ACI fabric
- What we need: configured CallHome feature to be able to receive important notifications about fabric functionality via email
- All instructions are actual for APIC version 4.0
Network connectivity
First important thing that you should check: all fabric devices should have network connectivity to your SMTP server. If some of nodes won't have that access, then they're will be unable to send messages. Yes, each device sends CallHome messages by itself, not via APIC's as I thought on beginning.
Create CallHome destination group and destinations
Location:
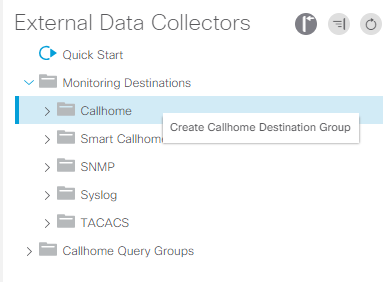
APIC > Admin > External Data Collectors > Monitoring Destinations
Right click on CallHome folder and select Create CallHome Destination Group.
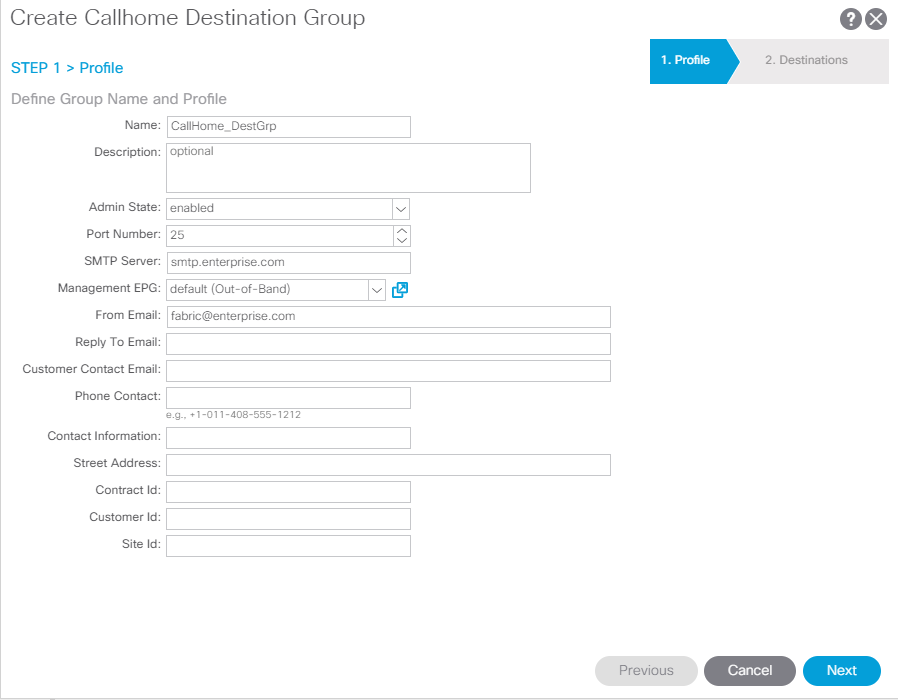
Required fields here:
- Name - Name of CallHome destination group
- SMTP Server - DNS name or IP address of SMTP server
- From Email - email address from which fabric will send you messages
- Management EPG - oob or inb EPG that has reachability to your SMTP server.
As you may have noticed, Destination group doesn't have authentication settings for SMTP server. So you need to make sure, that SMTP server allows sending messages from fabric node addresses.
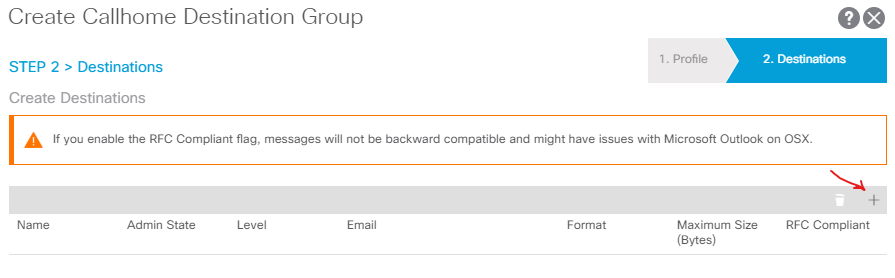
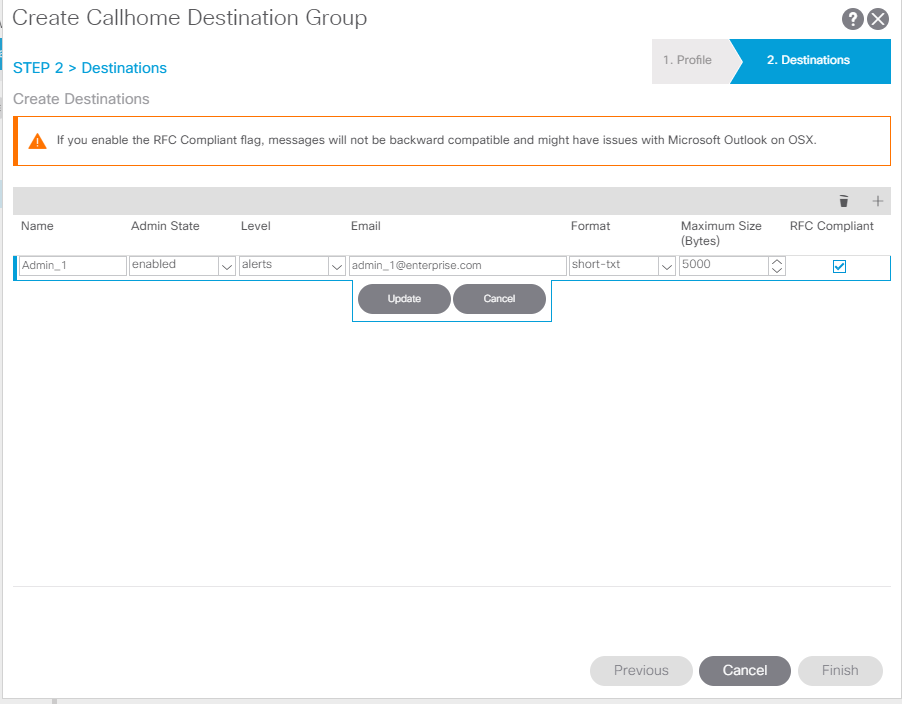
On next page you can create exact destinations (i.e. recipients of CallHome messages). Click on + sign and fill fields:
- Name - destination name
- Admin state - if disabled, then destination will not receive any messages
- Level - severity level of messages that will be sent to destination. I would recommend this set to error or higher. Table of severity levels will be provided below.
- Email - email address where messages should be sent
- Format - if you don't plan to automatically parse inbound messages then set this to short-txt. You can experiment to see the differences between them.
- Maximum Size (Bytes) - maximum size of a single email message. In case of you set Format to aml or xml then messages can be quite large, so number of 100-200KB are ok. You can experiment with this number to determine required size. For short-txt format it should be enough to set this to 10KB.
- RFC Compliant - I had an issue with this setting (or better to say "without it"), as my company Exchange server by some reason was deleting body of messages so I only had received email titles. After I set this option problem has gone.
You can create as many destinations as you need and also could create more by right-clicking on your CallHome Destination group and selecting Create CallHome Destination.
Severity levels
| Level keyword | Level | Description |
|---|---|---|
| emergencies | 0 | System unstable |
| alerts | 1 | Immediate action needed |
| critical | 2 | Critical conditions |
| errors | 3 | Error conditions |
| warning | 4 | Warning conditions |
| notifications | 5 | Normal but significant condition |
| informational | 6 | Informational messages only |
| debugging | 7 | Debugging messages |
Create CallHome Query Groups
Location:
APIC > Admin > External Data Collectors > CallHome Query Groups
Right-click on CallHome Query Groups folder and select Create CallHome Query Group.
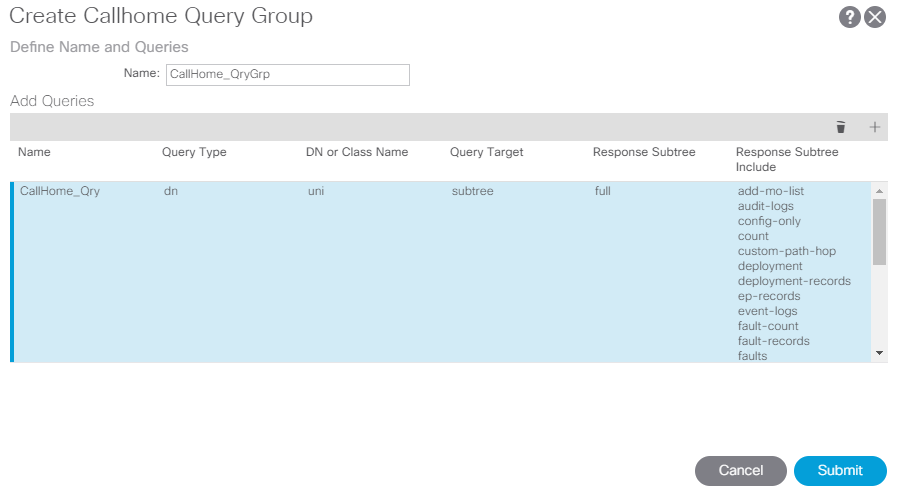
Define the name of query group and click on + sign to create query definition.
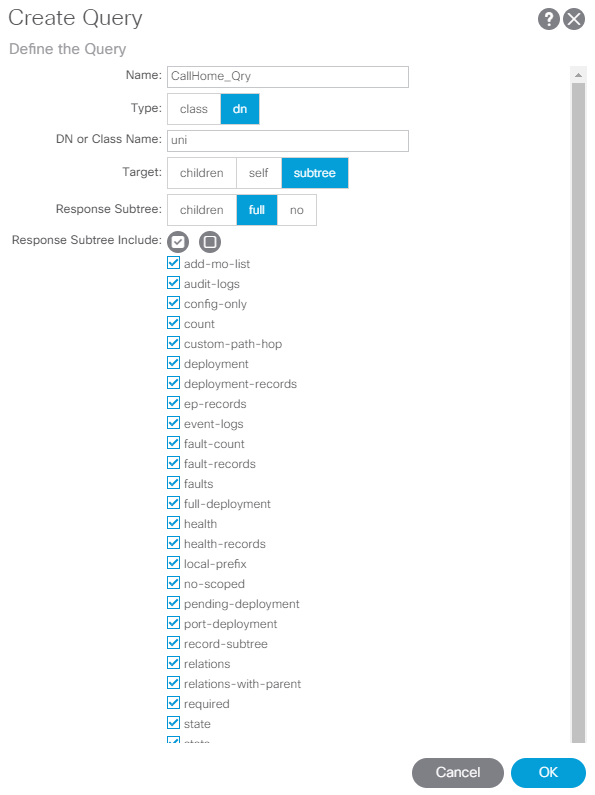
Fill fields:
- Name - query name
- Type - selector of object type that will be monitored for changes. I have here dn selected which means "distinguished name".
- DN or Class Name - name of monitored object. And that's where the magic comes into action! You will not find anywhere any kind of description of what kind of object name or whatever should be inserted in this field. In APIC prior version 4 this field wasn't required. From version 4 it is mandatory. If you've selected dn for Type, then you can put here
uniwhich literally means "Whole universe" or in other words - "All fabric objects". - Target - selects if subtree info should be included for object returned by query. I have subtree here selected.
- Subtree - selects subtree objects that should be returned from query. I have full selected here.
- Include - type of objects that will be returned by query. I have all selected.
Edit Fabric Monitoring policies and create CallHome sources
Now when we have CallHome destinations and queries set up, we can proceed with actual monitoring policy editing.
Location:
APIC > Fabric > Fabric Policies > Policies > Monitoring
You may have noticed that we have here Common Policy and default. As I understand from my experience, Common Policy is a default policy object that acts as template for all other fabric policies. Also you wouldn't be able to set any kind of filtering actions for events in Common policy, so I recommend to leave it as it is and stick around default policy.
Open default policy object and click on CallHome/Smart CallHome/SNMP/Syslog/TACACS.
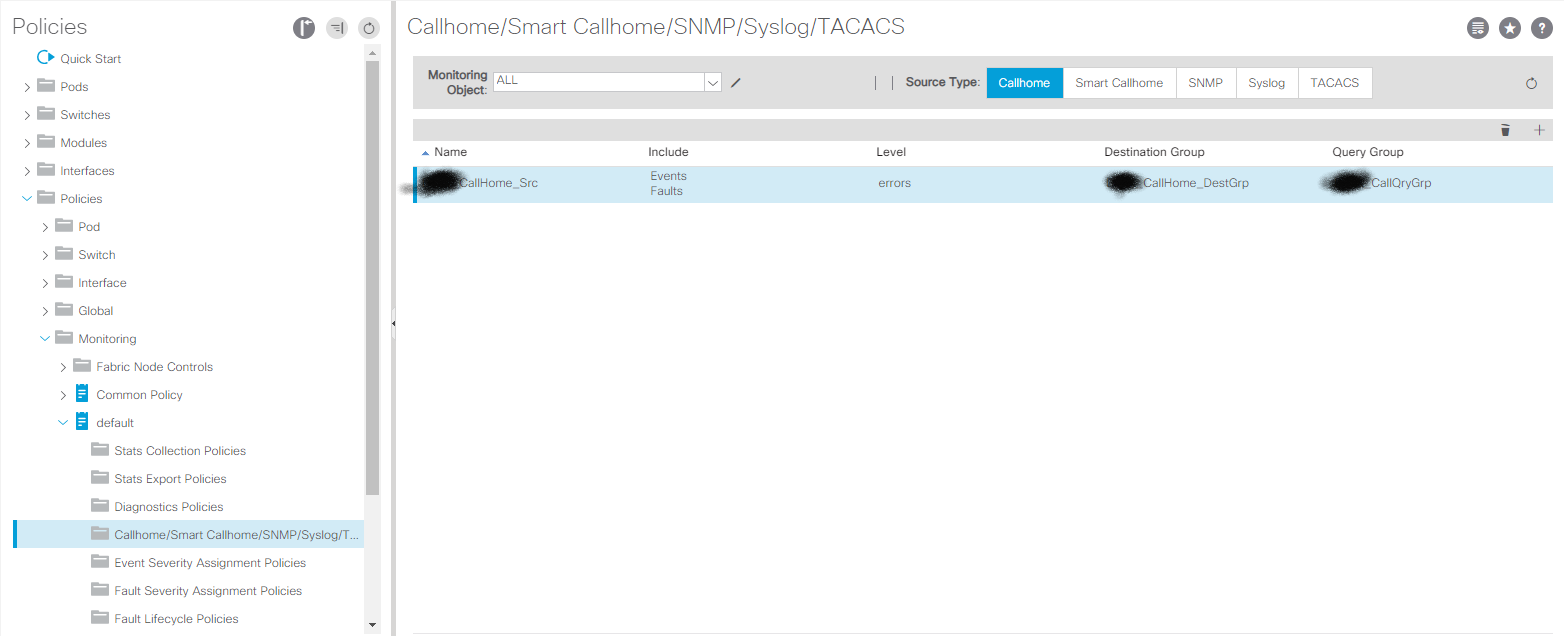
Make sure that you have value "ALL" selected in "Monitoring Object" dropdown and "Source Type" set to "CallHome".
Click on + sign in rightmost part of right pane:
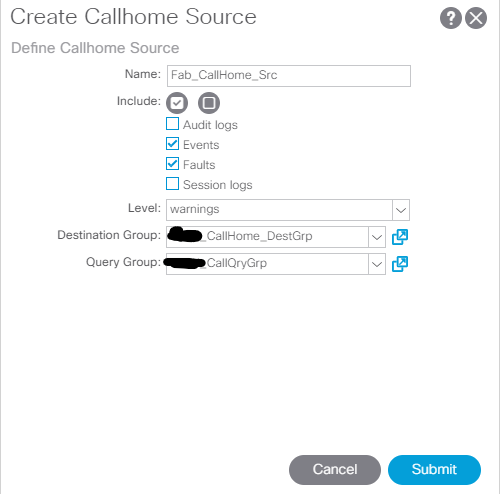
- Name - CallHome Source name (
Fab_CallHome_Src) - Include - select what kind of notifications you want to receive
- Level - event severity that will trigger action (selected level or greater)
- Destination Group - here you select CallHome Destination Group that we created before
- Query Group - here you select CallHome Query Group that we created before
Click Submit.
As you understand, you may fine-tune your monitoring policy and create different CallHome sources for different Monitoring objects and also utilize multiple CallHome Destination groups and queries.
Create scheduler and setup Inventory policy
Scheduler
Lets create scheduler that will be used for fabric inventory monitoring.
Location:
APIC > Admin > Schedullers > Fabric
Right-click on Fabric folder and select Create Trigger Scheduler:
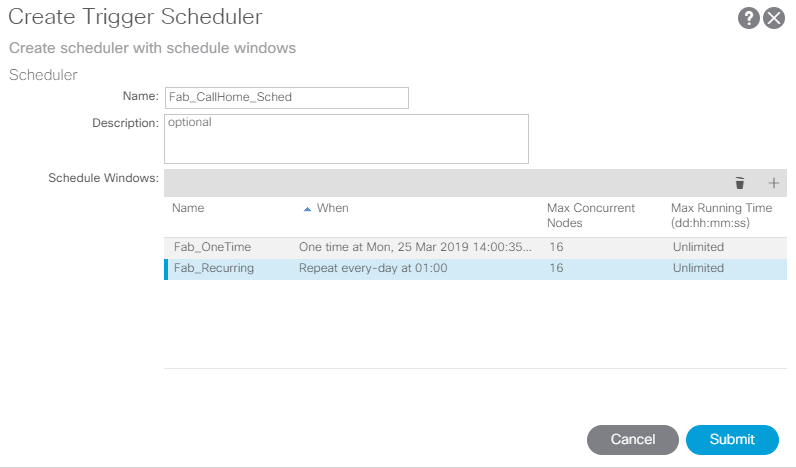
Enter name of trigger (lets say, Fab_CallHome_Sched) and then click on + sign. We need to create two schedule windows: one "one time" and one "recurring".
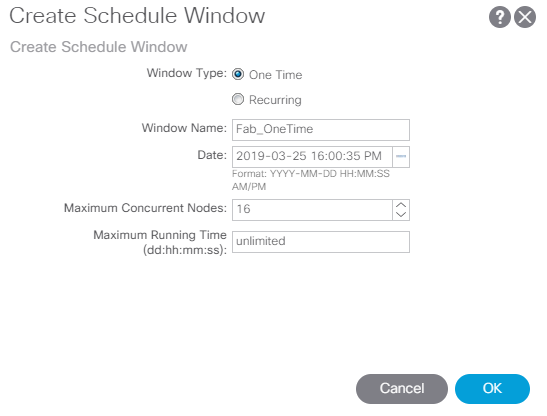
For one time window select Window Type to One Time, Window Name - Fab_OneTime, Date - select current date and time, Maximum Concurent Nodes - select your nodes number (leaves + spines), Maximum Running Time - leave as unlimited.
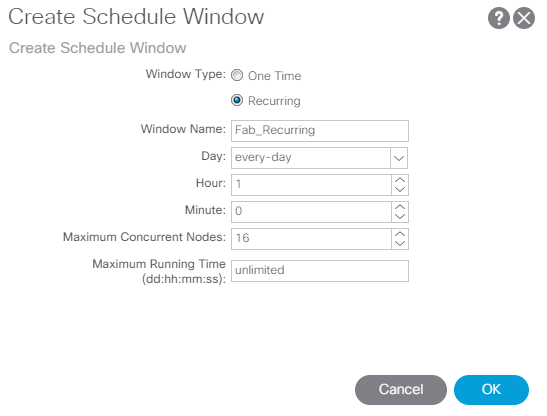
For recurring window select Window Type to Recurring, Window Name - Fab_Recurring, Day - every-day, Hour - choose hour when your inventory process will run (I have 1 selected here), Minute - same as Hour, Maximum Concurent Node - select your nodes number (leaves + spines), Maximum Running Time - leave as unlimited.
Click Submit.
Now we will apply created scheduler in inventory policy.
Inventory policy
Location:
APIC > Fabric > Fabric Policies > Policies > Switch > CallHome Inventory
Right-click on CallHome Inventory folder and select Create CallHome Inventory Policy:
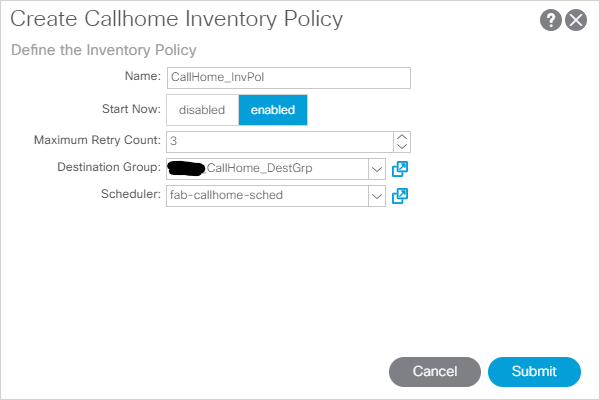
- Name - enter policy name (lets say,
CallHome_InvPol) - Start Now - check enabled
- Maximum Retry Count - maximum attemps that will be performed to send CallHome message in case of failure
- Destination Group - select CallHome Destination Group that we created earlier
- Scheduler - select here our scheduler
Fab_CallHome_Schedthat we created before
Click Submit.
Switch profiles
Lets create spine and leaf switch profiles to apply inventory policies.
Location:
APIC > Fabric > Fabric Policies > Switches > Leaf Switches
APIC > Fabric > Fabric Policies > Switches > Spine Switches
Actions are the same for leaf and spine switches. The only difference is the folders where policies and profiles located. I will cover creation of leaf policy and profile as example.
Open Leaf switches folder, right-click on Policy groups and click Create Leaf Switch Policy Groups:

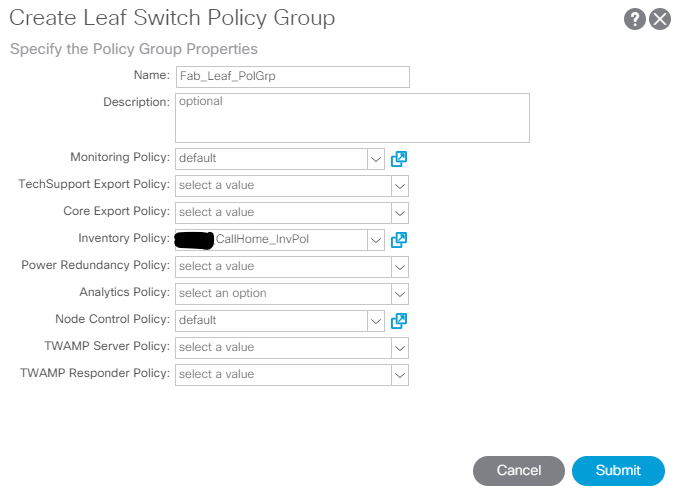
- Name - policy name (
Fab_Leaf_PolGrp) - Monitoring Policy - select
defaulthere - Inventory Policy - select our
CallHome_InvPol - Node Control Policy - select
default
Other fields may left empty.
Click Submit.
In Leaf switches folder right-click on Profiles folder and click Create Leaf Switch Profile:
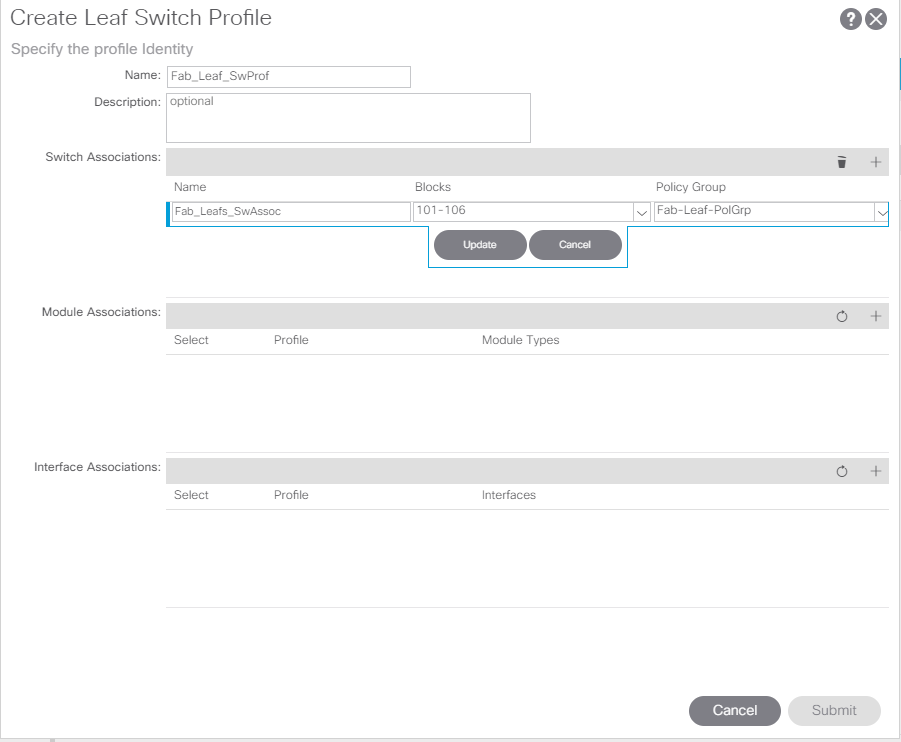
- Name - enter switch profile name
Fab_Leaf_SwProf - Switch Associations - here we need to create switch association where we will select all leaf switches and assign our policy group.
Click on + sign and fill fields:
- Name - enter switch selector name (
Fab_Leafs_SwAssoc) - Blocks - open drop-down and select all leaves
- Policy Group - open drop-down and select policy group
Fab_Leaf_PolGrpthat we created earlier in this section.
Click Update, click Submit.
Repeat these actions for spine switches.
Edit Fabric Access Policies CallHome sources
In this section we will modify fabric access policies to create CallHome sources.
Location:
APIC > Fabric > Access Policies > Policies > Monitoring
In Monitoring folder you will find default monitoring policy. Open default policy, click on CallHome/Smart CallHome/SNMP/Syslog/TACACS folder.
Next actions will be the same as in Fabric Policies.
Make sure that ALL is selected in Monitoring Object drop-down and Source Type is set to CallHome.
Click on + sign in rightmost part of right pane:
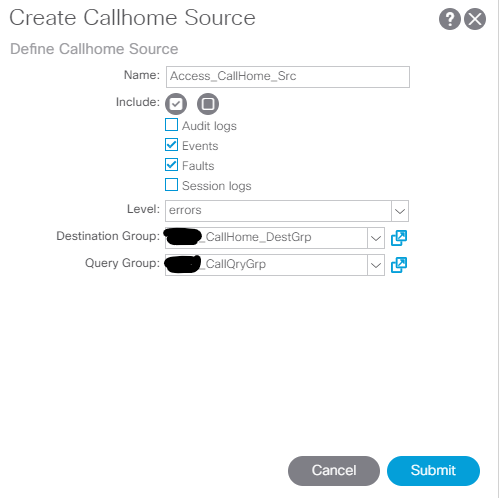
- Name - enter CallHome Source name (
Access_CallHome_Src) - Include - select what kind of notifications you want to receive
- Level - event severity that will trigger action (selected level or greater)
- Destination Group - here you select CallHome Destination Group that we created before
- Query Group - here you select CallHome Query Group that we created before
Click Submit.
Setup monitoring policy in Common tenant
To receive messages about important events also from Tenant objects like EPG's, service-graphs etc. along with global fabric messages, we need to tune Common tenant monitoring policy.
Location:
APIC > Tenants > common > Tenant common > Policies > Monitoring
Here you will found default monitoring policy. Open default policy and click on CallHome/Smart CallHome/SNMP/Syslog/TACACS folder. Make sure that ALL is selected in Monitoring Object drop-down and Source Type is set to CallHome.
Click on + sign in rightmost part of right pane:
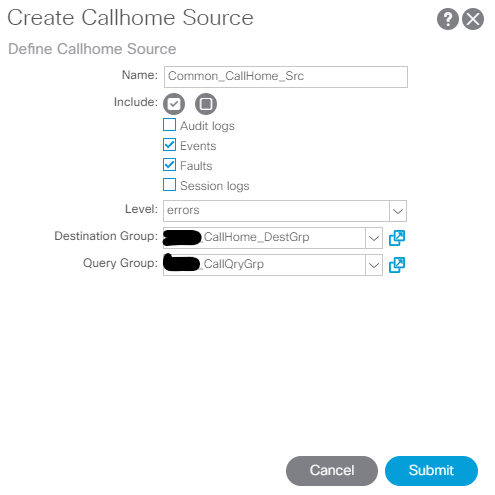
- Name - enter CallHome Source name (
Common_CallHome_Src) - Include - select what kind of notifications you want to receive
- Level - event severity that will trigger action (selected level or greater)
- Destination Group - here you select CallHome Destination Group that we created before
- Query Group - here you select CallHome Query Group that we created before
Click Submit.
Now you can create monitoring policy for your other tenants or use default policy from Common tenant.
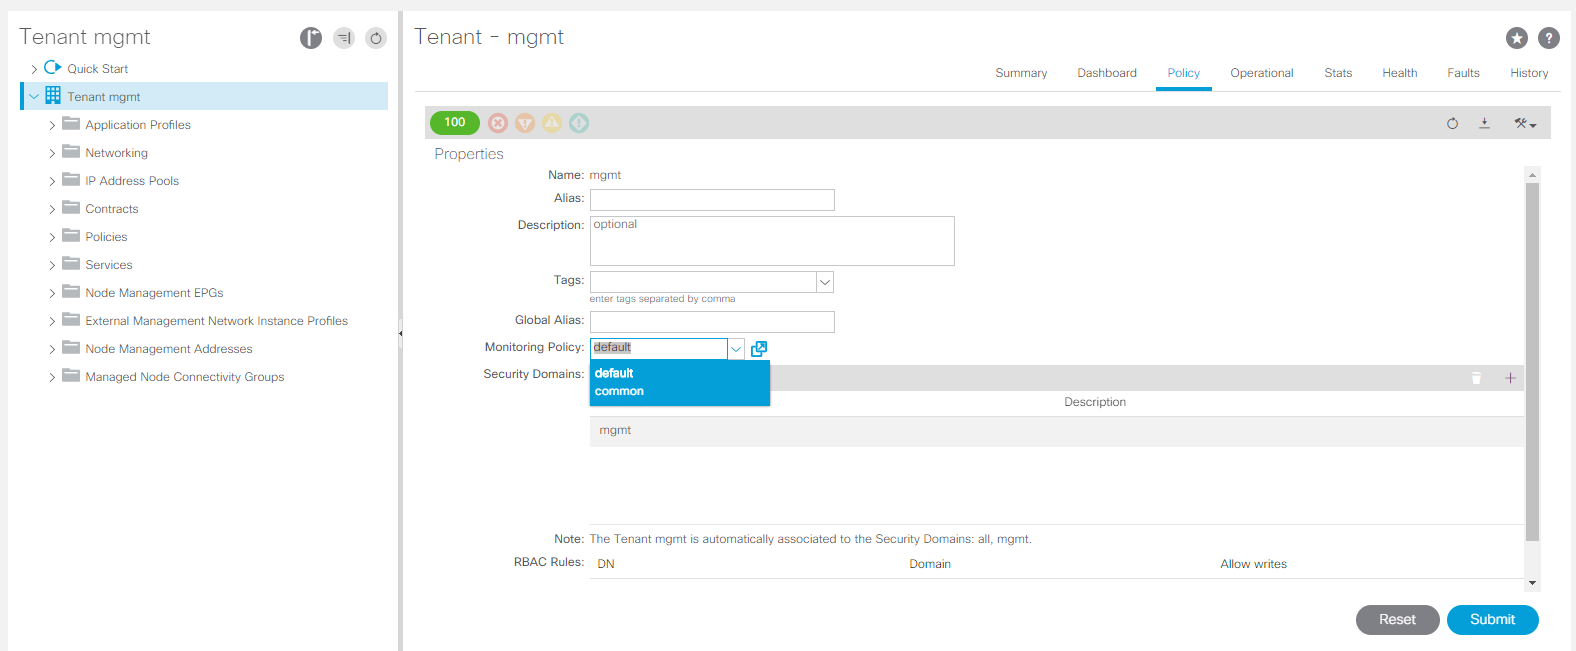
Lets assume that you have tenant Prod. To configure default monitoring policy from Common tenant in it, open tenant Prod, click on Policy item in right pane, scroll down and select default from Monitoring Policy drop-down.
Click Submit.
Afterword
We configured CallHome feature for ACI Fabric and will now receive messages if something will went wrong.
I will be happy to answer your questions if you will have ones.


Member discussion